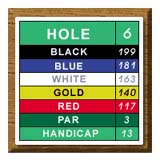
Hole #6
 |

This par three is protected by a series of small ponds in front of the green, lining the entire length of the fairway. The left side of the green is guarded by a large bunker. Proper club selection, which will vary depending on tee box placement, is critical when playing this hole.
 | |