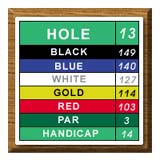
Hole #13
 |

Proper club selection is critical on the tee shot if you hope to clear the water yet avoid the hazard of the bunker on the back side of the green. Don't forget to take into account the green's backward slope toward the water from the bunker.
 | |